

The moment in which I felt most understood was the moment I saw this scene from 30 Rock:

Liz Lemon gets me. Heaven is being wrapped in a Snuggie next to a wood stove, just me, a knife, & a block of delicious, high-fat cheese. It’s the only food that is literally good on everything. Do not argue with this because it’s a non-negotiable fact. Cheese brings light to darkness, love to emptiness, and crackers to my mouth.
But making cheese? That seems like the Mt. Everest of culinary skills. Isn’t cheese the kind of thing that you have to learn from an ancient woman who doesn’t speak your language whose hands could grind wheat grains into pastry flour?
If you’ve braved the world of cheese making, or even thought about it, you’ve undoubtedly heard of rennet – enzymes that turns milk curds into press-able, firm chunks that result in harder cheeses like cheddar and parmesan. Would it be amazing to just quickly be able to whip out a block of gouda? Sure, but it’s a little unrealistic. Ever heard of “aged cheese?” Yeah, it takes a while.
But fear not – there is an option for instant gratification. Fresh cheese is extremely easy to make, and you probably have everything to make a gorgeous block of fresh cheese in your kitchen right now. Fresh cheeses include delicacies like ricotta, cottage cheese, cream cheese… you can have it all – without rennet! Today, I am going to show you how I made fresh paneer.


Lovers of middle eastern food & culinary adventurers: sit down for this, because after reading about how easy it was to make approximately 12 oz. of fresh, beautiful, fry-able paneer, you’ll be ripping the gallon of milk out of your significant other’s hands and throwing their PBJ in the garbage, all in the name of cheese.
Many would call paneer “Indian cottage cheese,” but to me it’s so much more than that! I first had it in saag paneer, which was full of spiced spinach and glorious paneer, served alongside fluffy naan or other flatbread. Paneer is special because it doesn’t melt.
Wait! Don’t close the page! I promise you that this melt-less cheese is still worthy of the holy “cheese” title. Much like another incredible non-melting cheese, halloumi, paneer takes very, very well to being fried. In fact, the paneer we didn’t use in the saag paneer we recreated (with this recipe from Aarti Sequeria), we fried in a little bit of oil in a very hot pan and then drizzled honey over it. Then ate it. With our fingers. Itwasamazing.

The ingredients you see in the photo above are literally all you need, in addition to some tools, to make a gorgeous block of paneer. Milk, salt, lemon juice. For the price of a gallon of milk and one lemon, you owe it to yourself to try this at least once!
Homemade Paneer (Indian Cottage Cheese)
Makes about 8-12oz. of cheese
Based on this paneer recipe by Aarti Sequeria
1 gallon of milk (not non-fat)
1/4 c. fresh squeezed lemon juice
1 tsp. kosher salt
Directions
1. PREP YOUR AREA: Put a colander/strainer/something with small holes in it in your sink and line it with a flour sack towel, or cheesecloth that has been folded over a couple times. Also find a large bowl that your strainer fits into, a plate that will fit into your strainer when inverted, and something heavy to place on top. Put a gigantic stock pot on the stove, as well, and get your ingredients ready – all three of them!
2. Pour the milk into a great big pot and heat it over medium heat. This is a lot of milk and it’s probably starting from a colder temperature, so it takes a long time. It’s important as the milk gets hotter to constantly be stirring to prevent the milk from scalding or burning. Keep your eye on this pot the entire time you’re making cheese! Your attention will be rewarded.
3. Once you’ve reached a gentle boil, add the lemon juice and reduce the heat to low. Stir! Are you still stirring?! Keep stirring! You’ll start to see opaque white curds forming out of the clear, yellow whey. Exciting! Try not to break up any of the curds, and as Aarti Sequeria says, stir in a way that encourages the curds to lump together instead of spread apart. If you break one or some, no worries! It’ll still be wonderful.
4. Once you think all the curds have been formed and the whey is all separated, kill the heat. Here’s the part where you use your pre-arranged sink setup. Carefully pour the curds and whey into your cheesecloth/towel and strainer. Note: You can save some of the whey in a jar – I hear it’s great for baking bread but haven’t tried it yet!
5. Gently, with cool water, rinse the curds to get rid of the lemon taste. It’s okay if a little remains, but to get the true paneer flavor, you have to rinse the curds. Use your fingers to gently move the curds around once they’re cooled down. Once they’ve been rinsed, add the salt and stir gently to combine.
6. Gather the edges of your towel or cheesecloth and bring them to the center overtop the curds. Twist the ends together to press the curds into a ball, squeezing out the whey, and then place the ball back into your strainer.(Stop here and you’ve got some pretty glorious ricotta!) Put your strainer over a bowl or pot and put your plate (or some kind of pressure-dispersing disc) into the top and add your heavy item. (Mine was a jar of whey!)
7. After as little as 20 minutes, your cheese will be ready. We left ours to sit and strain for a few hours, giving us a more firm and cube-able product. Wrap it tight in plastic wraps and keep it in your fridge for no more than about 4 days!
Making Paneer: Photos


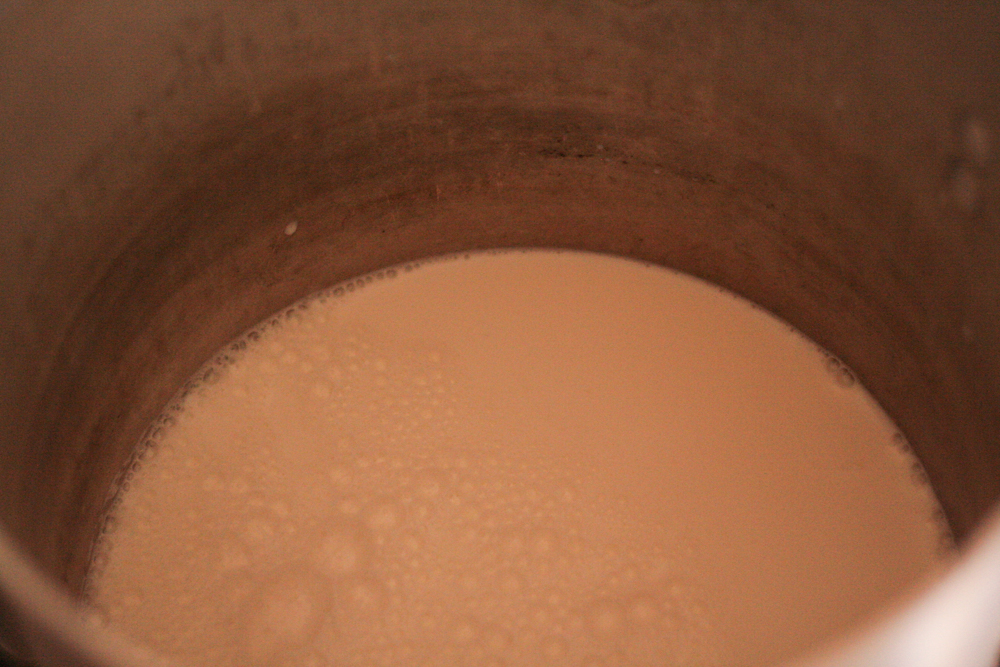
Bring this whole mess to a gentle boil over medium heat. It takes a long time, and constant stirring is mandatory, but it’s all worth it! Besides, each next step is quick and full of adrenaline.

This is all the lemon juice you’ll need to turn a gallon of milk into a block of cheese!


No one ever said that making cheese was cute. This is what your curds and whey should start to look like just after you put the lemon juice in and lower the heat.

All that yellew liquid is whey. It’s actually full of nutrients! Here are a bunch of ways to use leftover whey.

Ready for a rinse! Looks like ricotta already, doesn’t it?


Really gently just push the curds around so the water can get through. Cool, but not cold water is best.


Pick up all corners of the cheesecloth or towel and twist them gently at the top to press the rest of the water out.

Next time I think I will try using a flour sack towel because my cheesecloth, though folded over a few times, still let a lot of curds through. It resulted in a slightly softer texture than I wanted, but I think a flour sack towel would allow for a higher compression.

Here’s my great feat of engineering: my plate-over-cheesecloth-over-strainer-over-pot, all topped off with the quart of whey I managed to save!
We left ours pressing for about 4 hours. You can do as little as 30 minutes, if you want a really soft, fresh, farm-style cheese (think ricotta). The longer you press, the more firm the cheese will become. Play around with different textures if you become a fan!
After ours was done, we wrapped it up in plastic wrap and put it in the fridge until the next morning.
Then…


Isn’t it gorgeous?! This cool pattern came from the bottom of our strainer – which is actually the insert of a salad spinner… – and it was firmly embossed into the top. We tried to get it to be as round as possible, but you can only do so much with amateur equipment.

It was pretty firm, despite it looking a little lumpy. I really think a flour sack would fix this!

It looks angelic.
Leave me a comment if you try making this!! I highly recommend it, especially if you’re a novice who is interested in diving into homemade cheesemaking!